
Developing and scanning film at home

I've been developing and scanning at home for a bit now, and I've gotten enough people asking me about my setup that I figured I'd just write it down here once and for all. I have a tenured software engineer's laziness motivation to optimize. After a decent amount of trial and error, I'm pretty satisfied with my process.
I really enjoy being able to develop my film at home. It has a fairly high up front cost relative to getting a single roll of film developed and scanned, but once you've made the investment in the gear, your ongoing cost per roll is very, very low, because your only resource that gets exhausted is your chemicals. I pay an amortized < 2 chf per roll on chemicals, compared to 15chf per roll for ok dev and scan or ~27chf per roll for good dev and scan. The bigger perk for me though is just being able to do it whenever I want.
I'll walk through what gear I use for developing, what chemicals I use for black and white and color development, and finally I'll explain my scanning process.
Gear for developing
The following are the things I use, and not all are necessary but this is what works for me:
- 3-reel Paterson tank and reels. All reels suck to load, AP reels suck the least to load but they scratch my negatives so they actually suck the most.
- Dark bag for loading the reels and the tank.
- AGO image processor, which does automatic development time compensation based on the internal temperature of the tank. Expensive. Not necessary for black and white development. Not required for color development but certainly useful
- Lab Fish 6L water bath to keep color chemicals warm. Not necessary for color development, but certainly handy. You could use a bowl of hot water and wait but it's not as precise. Expensive.
- Funnel
- 500 mL graduated cylinder
- Large measuring cup for holding plain water
- 1L Kaiser Faltflasche/accordion bottles. You need one for each chemical you will reuse. For B&W, that's just the fixer. For color, you need 3: developer, bleach, and fixer. You can get away without using one for the bleach probably.
- Smaller ~500mL bottles to heat up in your water bath for color development. I use the Jobo ones because I am bougie
- 12 mL syringe for measuring small amounts of concentrate
- Clips/clothespins for hanging and drying your film. Anything will do honestly. You may need to use two clips, one for the top and one for the bottom, to hold the film flat while drying.
- A big bin with wheels to store it all in.
I'm not going to walk through loading a paterson tank, theres tons of videos that do a better job online.
Black and white development
I do a traditional dev/stop/fix for black and white development. I used to use Cinestill Df96 for black and white, which was convenient because it is fast. However, you get uneven development and it's annoying because it goes bad pretty quick.
I have now switched to using (ars-imago shill warning):
- Ars-imago FD developer. This is approximately the same thing as Bellini hydrofen. It's nice because you can push with it but it still looks good. I buy the 250 mL bottles and they're great. I do one-shot development meaning I mix up enough concentrate to do a 1+39 dilution, then pour it down the drain when I'm done. Note that this should be done at 20C which is about the temperature of the water that comes out of my tap on the near-coldest setting.
- Ars-imago ecostop bath. I douse my rolls in this at 1+19 dilution for a minute after development.
- Ars-imago rapid fixer. I fix for 4 minutes and make a new liter of fixer at 1+5 dilution about every ~16 rolls. Fixer cannot go down the drain as it contains silver ions, which are bad for the environment and also very bad for your pipes! Leave your spent fixer in a bucket with some steel wool for a week, let the wool leech out all the silver ions and convert it to metallic silver, THEN you can pour it down the drain.
Black and white is so easy because it doesn't require very precise temperature management (although the AGO makes this easy). I think everyone should try black and white development.
I don't know my exact development cost per roll here but it is very low, somewhere between 25-40 cents per roll.
Color development
C41 is the name of the standardized color development process. Color development consists of several stages: development, bleach, fix, wash, stabilize.
The color development process is a bit trickier than black and white because the chemicals need to be kept at a certain temperature and a few degrees off will mess everything up. I started doing color development at home a few months ago after being really nervous to invest in the extra equipment and chemicals, do something wrong, and ruin expensive color film and all my nice pictures.
I was convinced to try it after watching this video where an irish man (who is now an acquiantance of mine!) with a soothing voice tells you it's going to be ok:
I'm here to also tell you: it's going to be ok. Just follow the instructions and you're going to be ok. If you're a few degrees off, you might have some color shift, but you can always correct that in the scan.
For color, I use the ars-imago c41 kit. It's probably the same as the Bellini c41 kit. I've also heard good things about the new adox c41 kit.
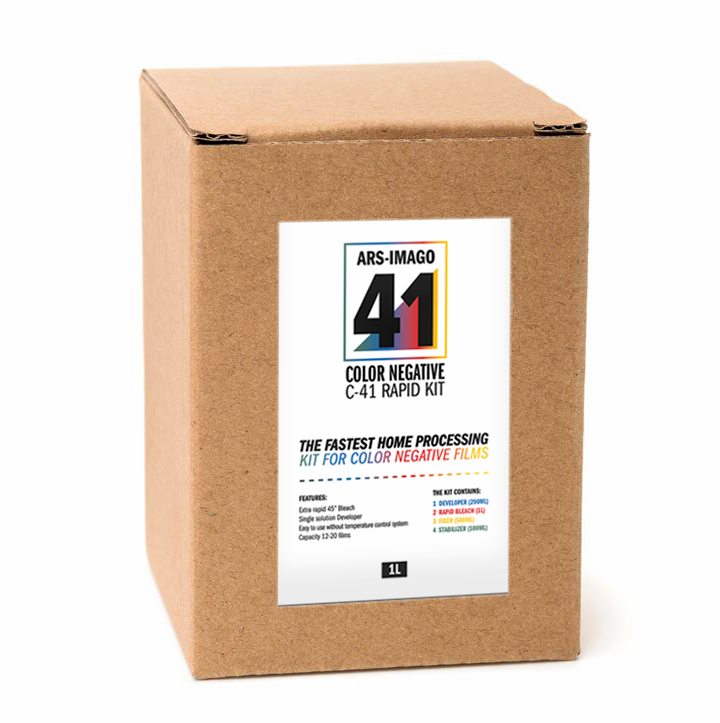
Inside the box you have a concentrated developer, bleach, concentrated fixer, and concentrated stabilizer. It's good for 12-16 rolls over 5 weeks. The bleach and fixer are actually good for >32 rolls, so you can buy a standalone developer "booster" from ars imago once you exhaust the developer from the kit and keep going.
Other c41 kits combine the bleach and the fixer into "blix" which means you have one less step for development. This simplifies things but I've heard blix has a shorter shelf life than separate bleach and fix.
You will need to dilute the concentrated chemicals with water to make 1 liter of working solution of each, and importantly you will need to store this working solution. That means: more bottles. I use these 1L accordion bottles from ars-imago (faltflasche)
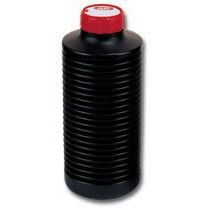
After you dilute your concentrated chemicals and pour them into these bottles, you can squish the air out of them before putting the cap on. This allows the chemicals to be used for longer as they are (especially the developer) prone to getting oxidized and weakend. Sunlight will also mess them up, especially the bleach, so it's good to store them in opaque bottles.

Really importantly, it's ok for a bit of developer to get into the bleach, and for a bit of bleach to get into the fixer, but super not ok in the reverse direction. For this reason, you want to really clearly label every bottle and cap. Putting the wrong cap on and getting a drop of the wrong chemical in your bottle can ruin the entire bottle of chemicals.
Heating the chemicals
During color development, the chemicals need to be kept at 38C. This is only crucial for the color developer, the bleach and the fixer just need to be about the same temperature. This is done in the lab box by first putting in some tap water pre-wash to heat the tank and the film, then the developer, then the bleach and fix.
For heating the chemicals, typically for home development you see people using an off the shelf sous-vide or the CineStill bougie sous-vide Temperature Control System.

However, this is a bit wasteful as you only need 300-490 mL of each chemical to be heated up. With the sous-vide, you need to fill the water bath to a certain level, which is often "deeper" than 300mL of chemical in your bottle, so the bottles float around and flip over. You can heat up your whole liter of each chemical and pour out what you need, but this will likely take a while to heat up to the correct temperature. A sous-vide also makes some amount of noise as it circulates the water.
I noticed flicfilm had this small incredible water bath that looked exactly like what I needed.

However, I'd have to import it from the US, and also it doens't work with european 220v sockets. I know because I asked flicfilm and the president of Alberta, Canada wrote back to me!

So I knew I wanted a similar chemical water bath, and asked my friends who are all microbio PhDs where I could get one.


The answer to where can I get a water bath for science, of course, was Amazon. That's when I found out that the flicfilm water bath was just a whitelabel chinese water bath and there was a version that supported european voltages. The particular one I bought was the Lab Fish digital laboratory 6L water bath:

For bottles, I bought the Jobo 4x 600mL bottle set.
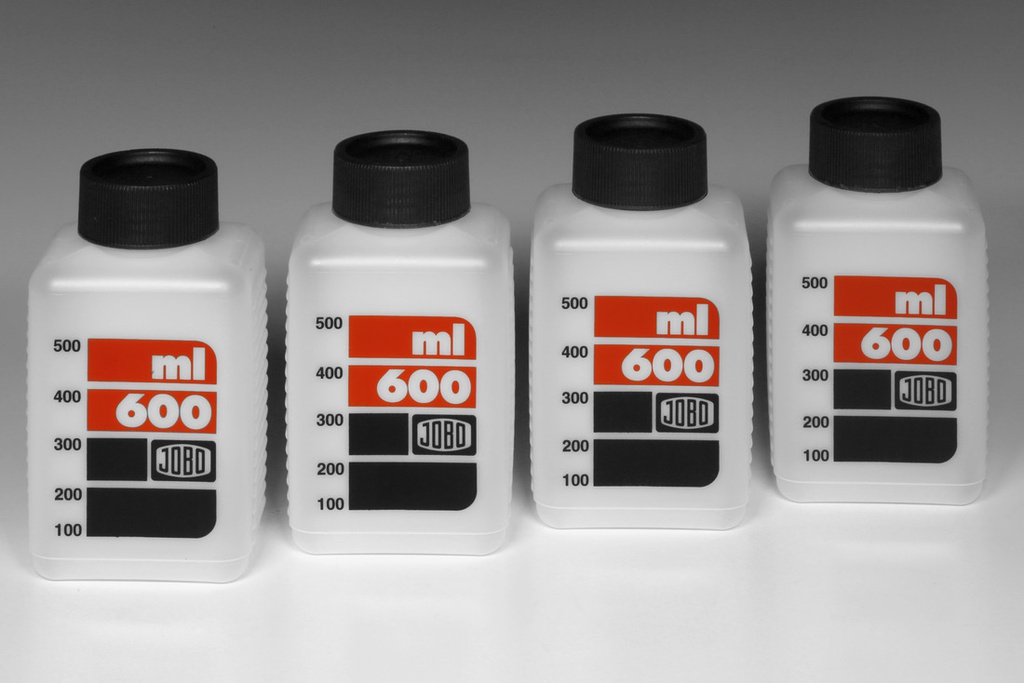
A bit pricey because it's Jobo, but this has the advantage of having measurements on the bottle, so you can just pour directly from your 1L bottle into the jobo bottle without having to pour it into a measuring cup first, and risk cross-contamination.
For developing with the C41 kit and the AGO, I pour out ~450-500 mL each of developer, bleach, and fixer into their corresponding bottle, then put them and the loaded paterson tank all together in the water bath.

This bath is silent too, which is nice. I fill it with warm water from the tap and then set it to 42C, then leave the bottles and the tank in the water bath to warm up for ~15 minutes. I cram the AGO onto the tank already otherwise it's too buoyant and will float.
Then the fun begins. Follow the kit instructions! I used to pour hot water and agitate for 3 minutes in order to heat up the tank, but recently discovered that this presoak was the source of my magenta-red shadows, and now I heat up the tank in the bath with the chemicals. At 42C, the color developer stays at 39-38C after being poured into the tank.
When pouring in the developer, bleach, and fixer it is again absolutely crucial to already be agitating the film for rotary processing, otherwise you will get uneven development. I learned this the hard way. I usually extend all the dev times by 5 seconds to allow for pouring in the chemicals.

Scanning
Holy moly this is so many words already. Ok lets get into scanning.
I started off scanning with the Plustek 8300 and Silverfast for inverting the negatives.
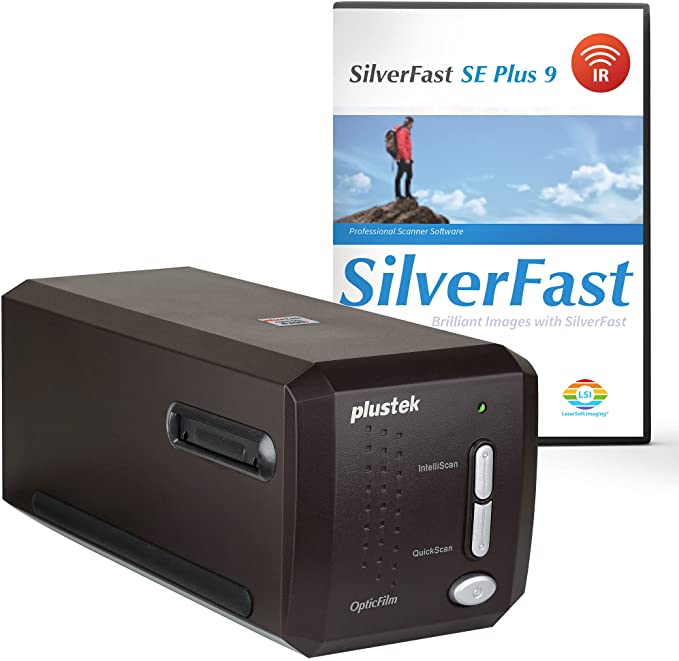
This gave me very high quality results, and the plustek can automatically remove dust which is amazing. But it takes AGES. A single frame takes a minute to scan, and then with Silverfast you need to process it in the software before moving on to the next frame.
You can somewhat parallelize it by just scanning with the plustek and then inverting with different software. This is what I did for a bit using the plustek to scan tiffs to a directory and then FilmLab for the inversion. It was still super slow to scan an entire roll though, and you have to cut the roll into strips of 6 frames to fit the plustek's film tray.
I had tried scanning with a digital camera when I was experimenting with panoramic 35mm and medium format. I kind of gave up on scanning with a digital camera because it was annoying to set up and I wasn't happy with the results.

However, everything changed when I got the Valoi easy35.

The easy35 is basically a light table filter that you screw onto your lens. You then pull your film through and for each frame take a pic. I'm now using a Fujifilm X-T5 with the Laowa 65mm 2x Ultra Macro apo. I used to use an Fujifilm X-E4 with a 7Artisan 60mm f/2.8 v2, but went higher resolution and sharper when I started scanning medium format. Literally any digital camera + macro lens will do fine, though I recommend the following:
- Use a mirrorless camera that supports electronic shutter, as there will be less shake when you take the picture.
- Use a macro lens that is internally focusing, or at least does not flex at all if there is a heavy filter at one end. I used to have the cheaper TTartisan 40mm f/2.8 macro, but the flex in the barrel added notable distortion to my scans.
My scanning process is roughly:
- Turn on the camera and the easy35 light table. I leave the light table set to the coolest setting for both color negative and black and white.
- Take a photo of nothing. The easy35 backlight is not even, and you will have potentially some vingetting from your macro lens as well, so we'll use this as our correction image
- Insert the film to the easy35 with the emulsion side facing the camera (the less glossy side). Pull it through to the first frame.
- Set your macro lens to ~f/8 and focus on the grain. Take a pic
- Pull to the next frame and take a pic. Continue until you're done.
- Copy all of the images to a new folder with a semi descriptive name in my scans/ directory.
Pakon
Tee hee. Confessing a new piece of gear I got in the bottom of a blog post. No one will know.
For 35mm, especially Kodak color 35mm, I now use a Pakon F135+ to scan. The scans are not as "good" as scanning with the easy35 + macro + literally any decent mirrorless camera, BUT they do have a look to them I can't recreate in lightroom. I don't know what it is. It blows the highlights and sometimes the colors are strange. But they have that nostalgic look to them that you only get from an old dedicated film scanner.

Negative Lab Pro
I used to use FilmLab, see below, but as of December 2024 I decided to give Negative Lab Pro a serious try. I had so far avoided Negative Lab Pro because it's a Lightroom plugin and I hate being dependent on Adobe and paying their subscriptions. Unfortunately, Negative Lab Pro does have that sauce that none of the other inversion apps I've tried have done for me. It gets me a lot closer to what my lab scans look like vs FilmLab, which tends to have less good colors.
I use Negative Lab Pro in the standard way:
- Import my just scanned roll into Lightroom
- In Lightroom, crop/rotate, white balance off the film base, and apply a slight positive vignette to counteract the falloff from my macro, and sync those edits across all the scans
- Invert the whole roll with Negative Lab Pro. If I have fairly consistent lighting across the whole roll (because I blasted through it in a single hike) I'll use roll analysis.
- If the colors are crazy after inversion, I usually tone down the "pre-saturation" setting, then reinvert. NLP takes a lot of trial and error until you get a look that you like, I'm still figuring it out.
- Otherwise I use very standard NLP settings, I just correct the basic colors that I can hopefully apply across the whole roll as much as possible, then I'll do per-image tweaking if they deserve it.
- I then export as jpg at 16 megapixels, which I've found is a good tradeoff between size and resolution, even with medium format.
Anything posted here since December 2024 has used Negative Lab for the inversion instead of FilmLab. The only time I might use FilmLab is for 400D film since the colors look better than NLP for some reason.
[Old, but still fine] Inverting with FilmLab
I can then invert the entire roll in one go with FilmLab. FilmLab is super simple and doesn't give you a ton of control. I usually invert, pick my correction image, crop, make basic white balance and density adjustments, then copy paste those edits over the rest of the frames from the same roll. Then I export and clean up dust and do minor tweaks on the bangers in apple photos.


All done
That's it! All told it takes me:
- ~5 min to set up the tank and the water bath and get my chemicals warming up.
- 20 min for them to warm up all the way. (skip if black and white)
- ~8 minutes pouring chemicals etc for color, 5-15 minutes for black and white, then 5-10 min final rinse for both.
- ~2-5 hours to dry, or just let it dry over night.
- 5 min to scan a roll, then however long it takes to edit to what I'm happy with.
If you made it all this way, thanks for reading!
(no affiliate links were harmed in the making of this post)